How To Setup Python + Jupyter Notebook + VS Code on Windows
A complete guide on how to setup Python, Jupyter Notebook, and VS Code on Windows.
How To Setup Python + Jupyter Notebook + VS Code on Windows
Setting up Python with Jupyter Notebooks in VS Code on a Windows machine is a straightforward process that will expand your data science capabilities. Here’s a quick guide to get you started.
Step 1: Install Python
Begin by downloading the latest version of Python from the official Python website.
During installation, ensure you select the checkbox that says "Add Python to PATH" to make Python accessible from the command line.
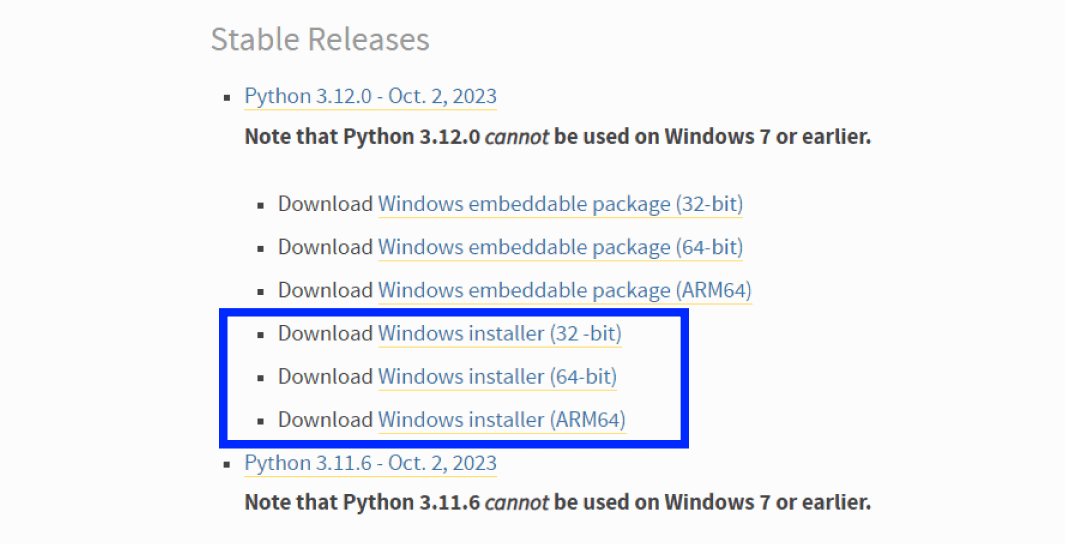
Verify that Python is installed by opening a new terminal window and typing python --version. You should see the version number of the Python installation you just installed.
# Verify Python installation
python --version # Python 3.12.0
Step 2: Install Visual Studio Code
Download and install VS Code from the official website. Launch the application once installed.
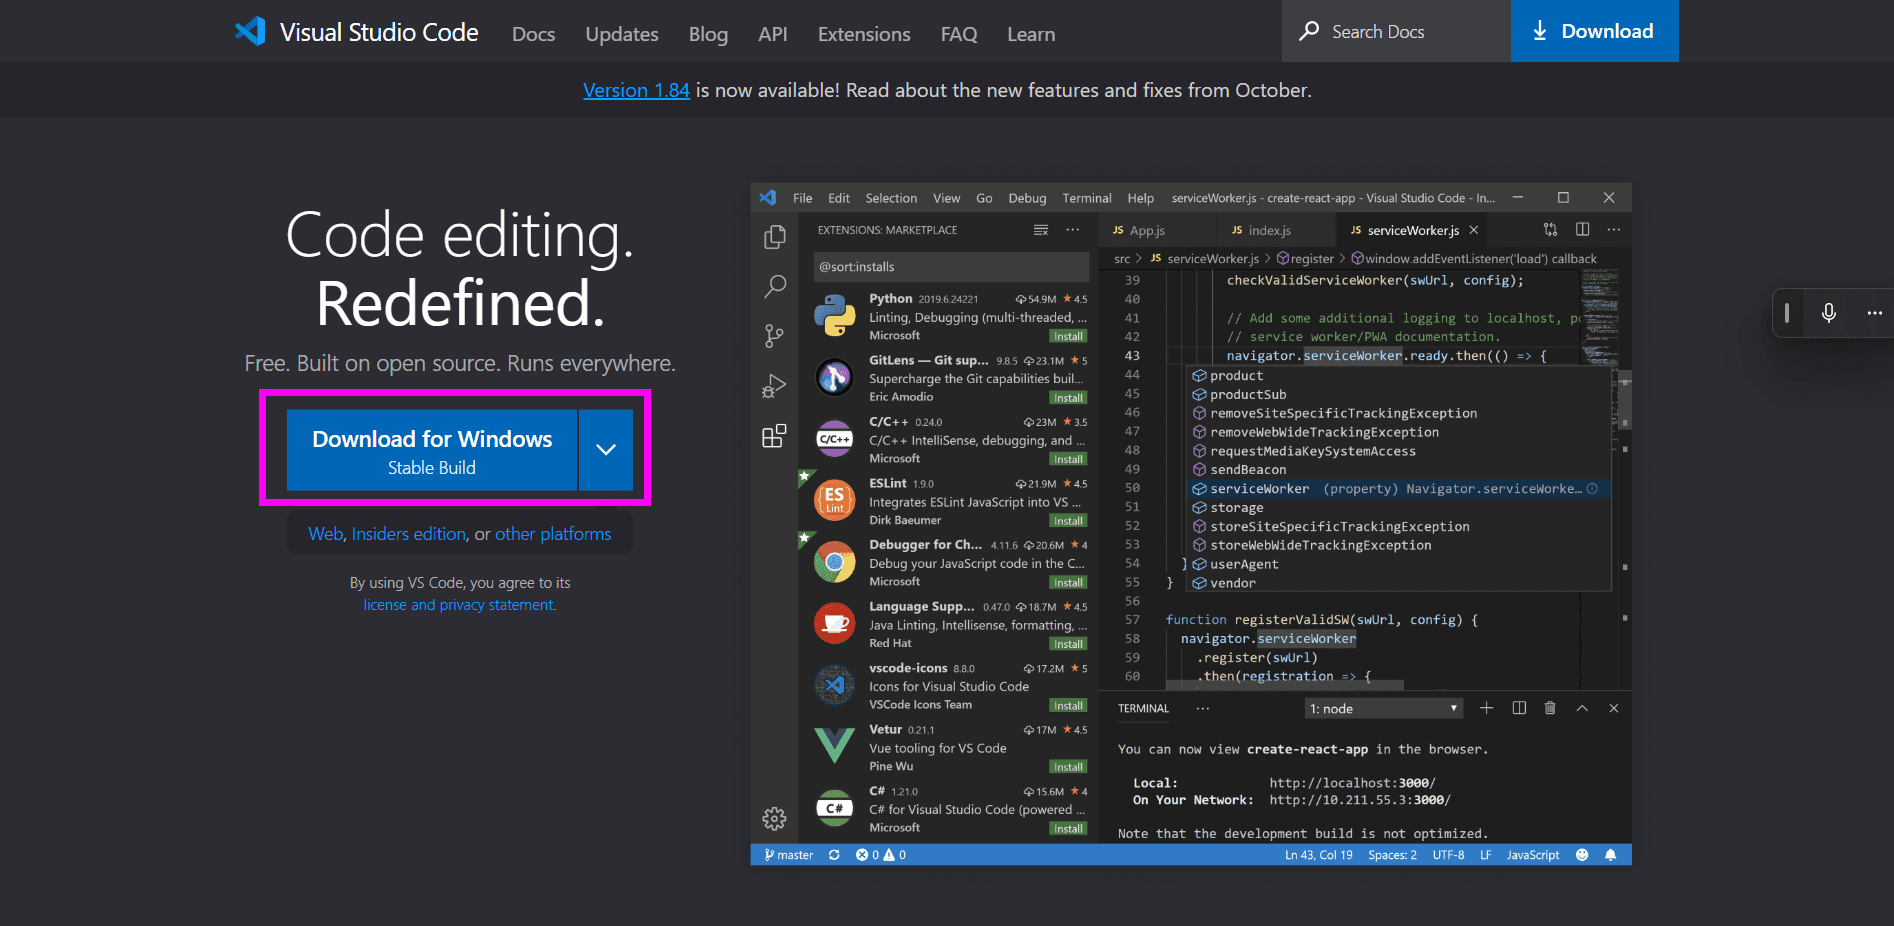
Step 3: Install the Python Extension for VS Code
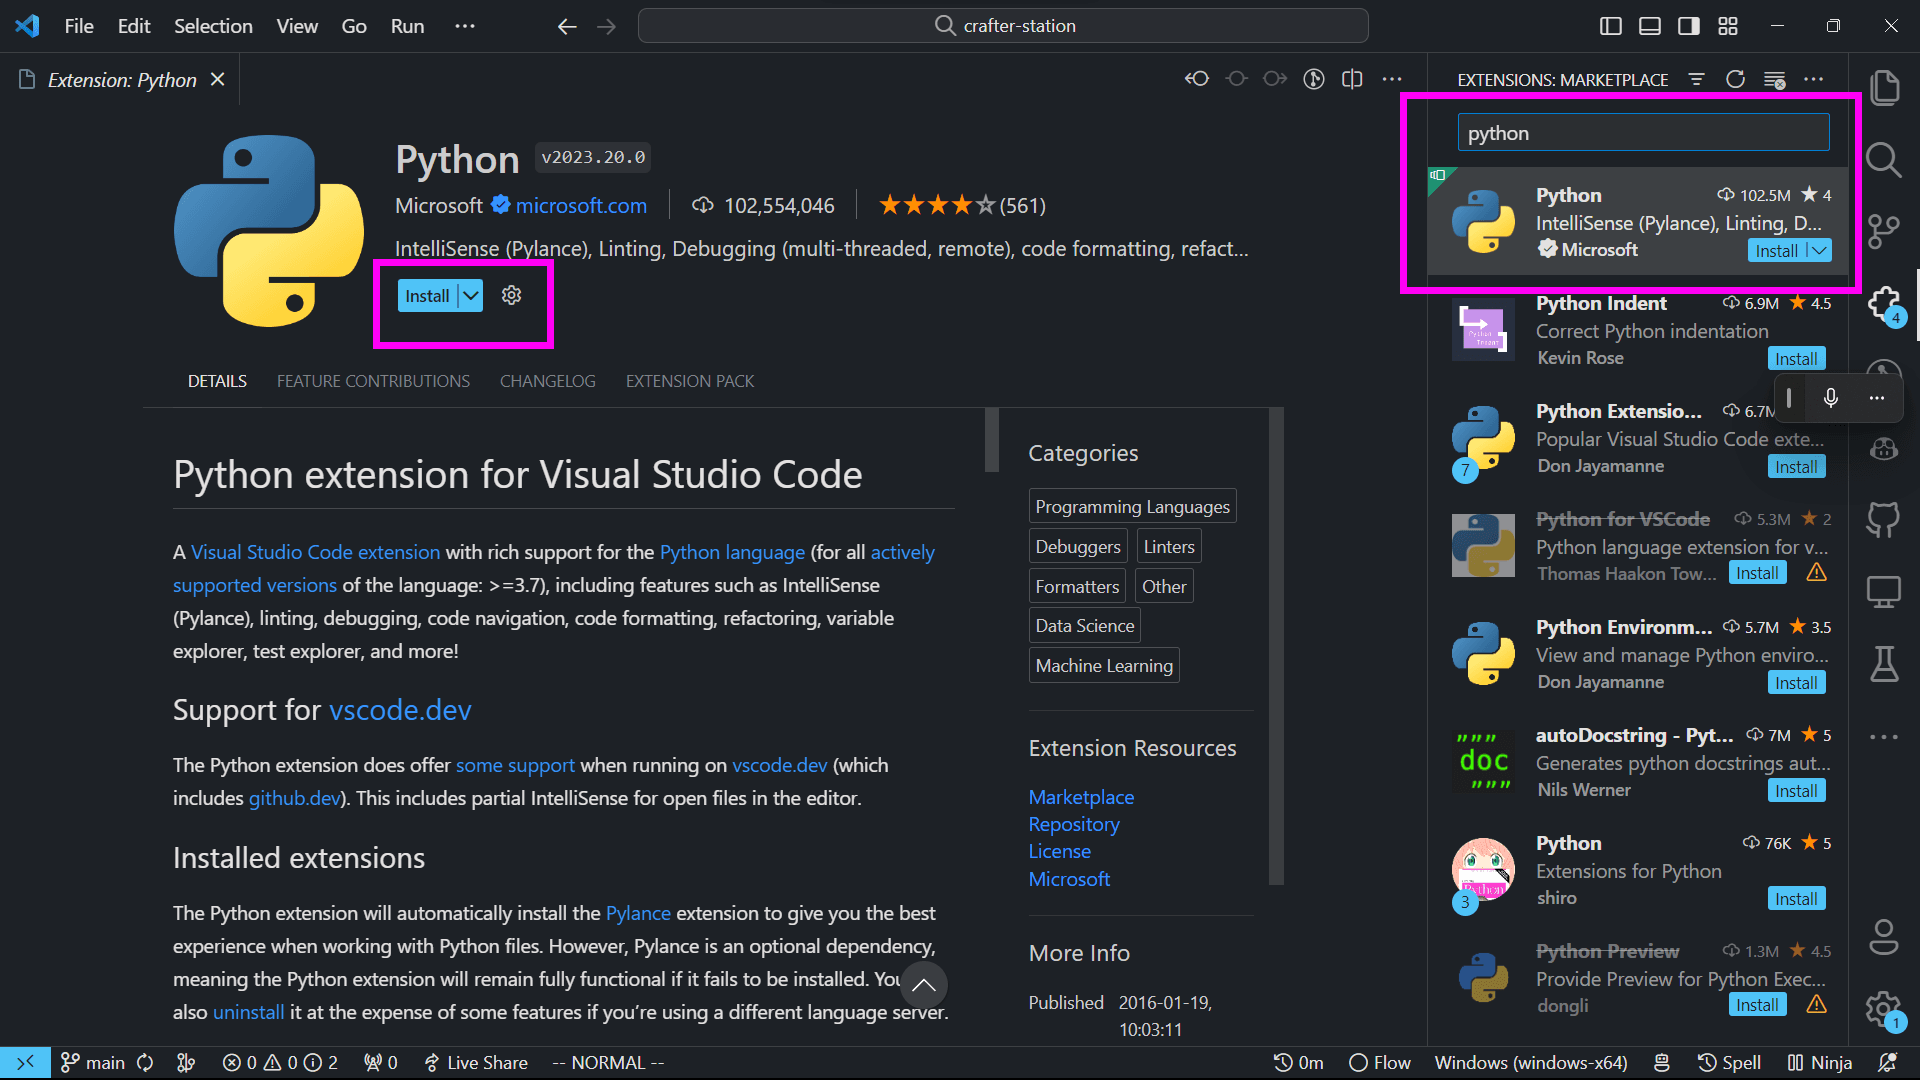
In VS Code, navigate to the Extensions view by clicking on the Extensions icon on the sidebar, or pressing Ctrl+Shift+X. Search for 'Python' and install the extension provided by Microsoft.
Step 4: Install Jupyter
Open the integrated terminal in VS Code with Ctrl+ and install the following libraries using pip:
# Install Jupyter and other libraries
pip install jupyter opencv-python matplotlib numpy
Step 5: Create a Notebook
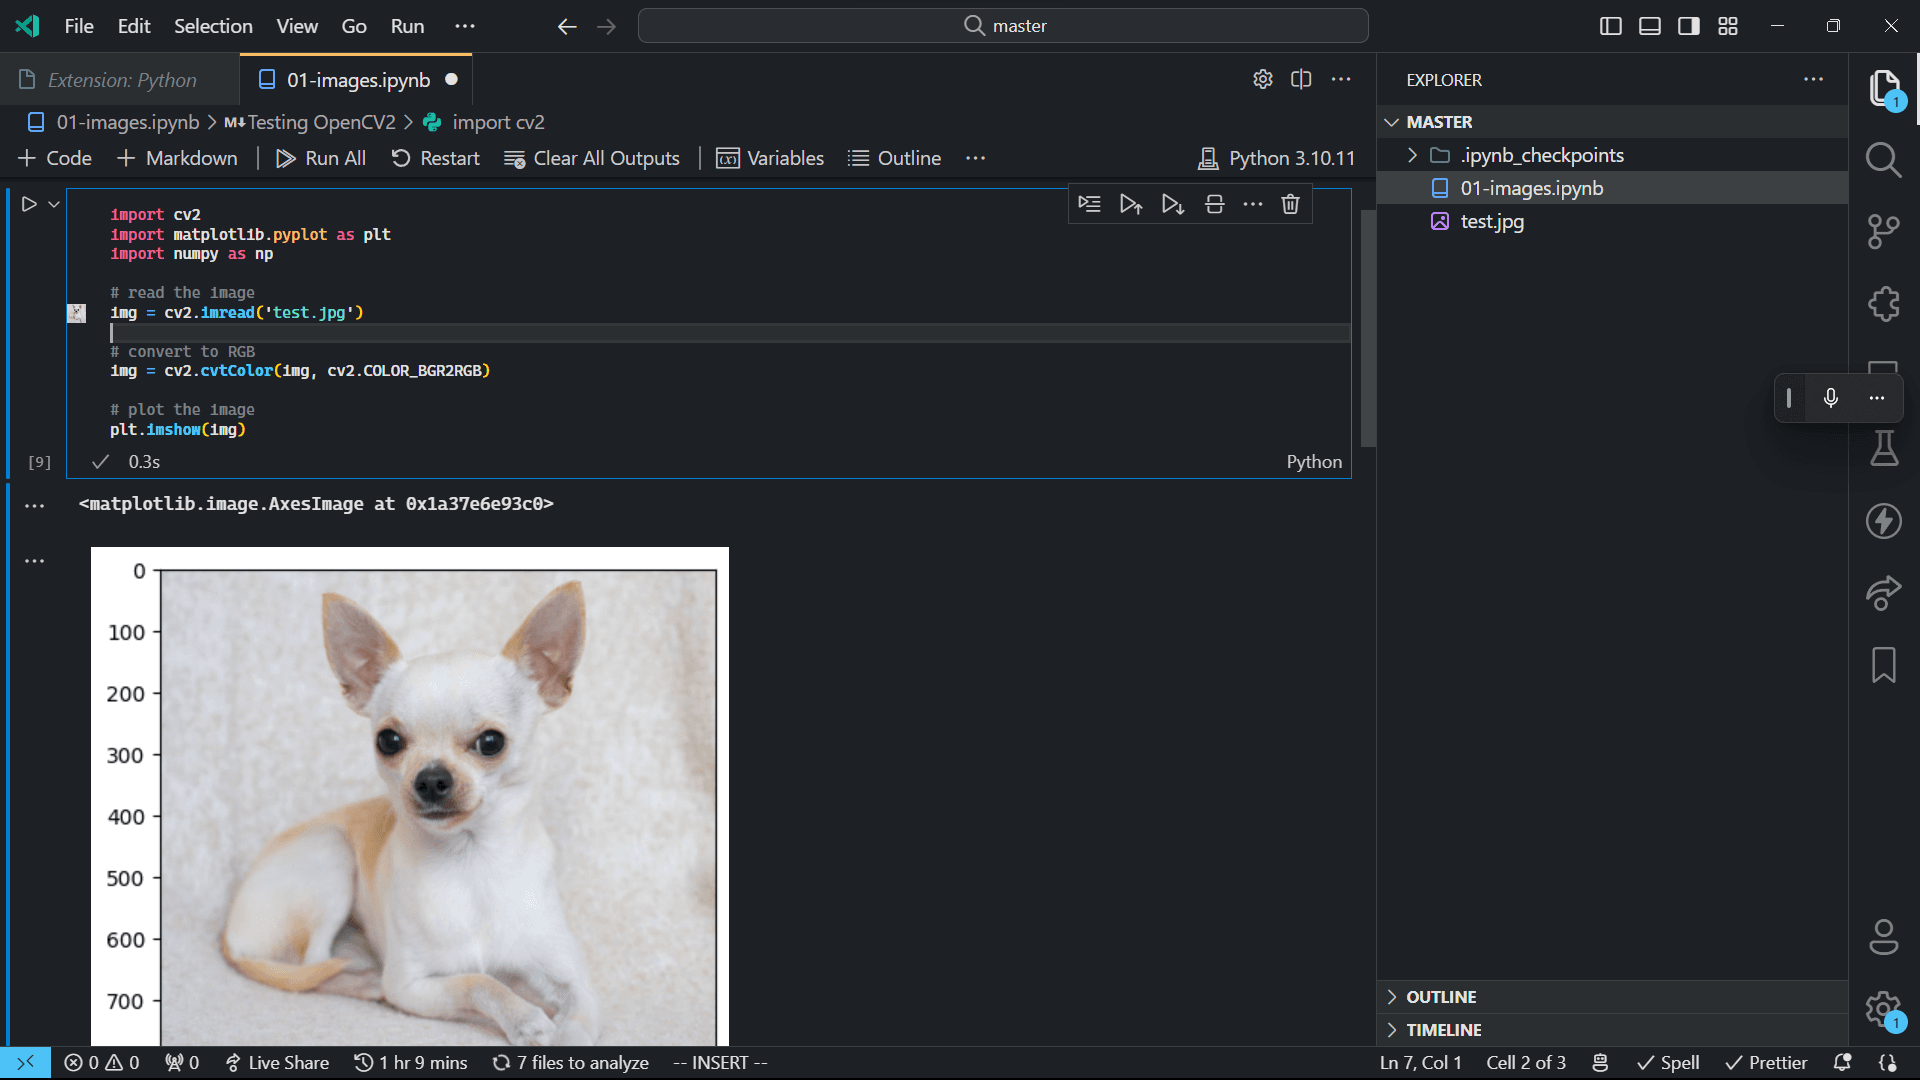
Once Jupyter is installed, you can create a new notebook by clicking on the 'New File' icon and selecting 'Jupyter Notebook'.
Or simply create a new file with the .ipynb extension with the following content:
Note: Make sure you have the
test.jpgfile in the same directory as the notebook.
import cv2
import matplotlib.pyplot as plt
import numpy as np

# read the image
img = cv2.imread('test.jpg')
# convert to RGB
img = cv2.cvtColor(img, cv2.COLOR_BGR2RGB)
# plot the image
plt.imshow(img)
Step 6: Install and Select a Python Interpreter
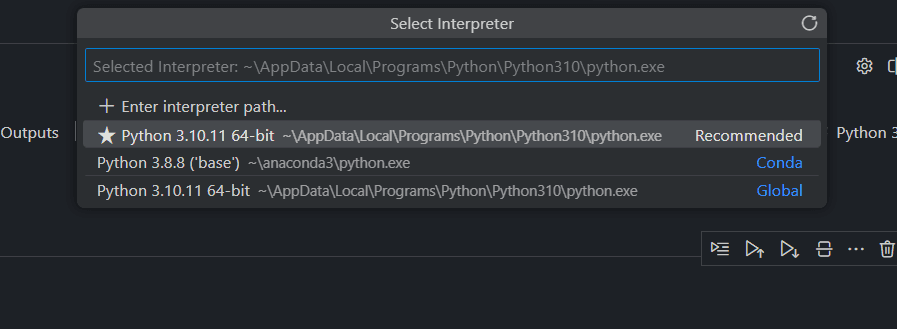
VS Code should prompt you to select a Python interpreter when you open a notebook. If not, you can select one by clicking on the Python version in the status bar at the bottom or using the command palette (Ctrl+Shift+P) and searching for "Python: Select Interpreter."
Step 7: Run Your First Cell
Type some Python code into a cell, and then use Shift+Enter to execute the code and see the output below the cell.
Step 8: Optional - Run Jupyter Notebooks Locally
Ne installed Jupyter in Step 4, so you can run the following command to start the notebook server:
# Start the notebook server
jupyter notebook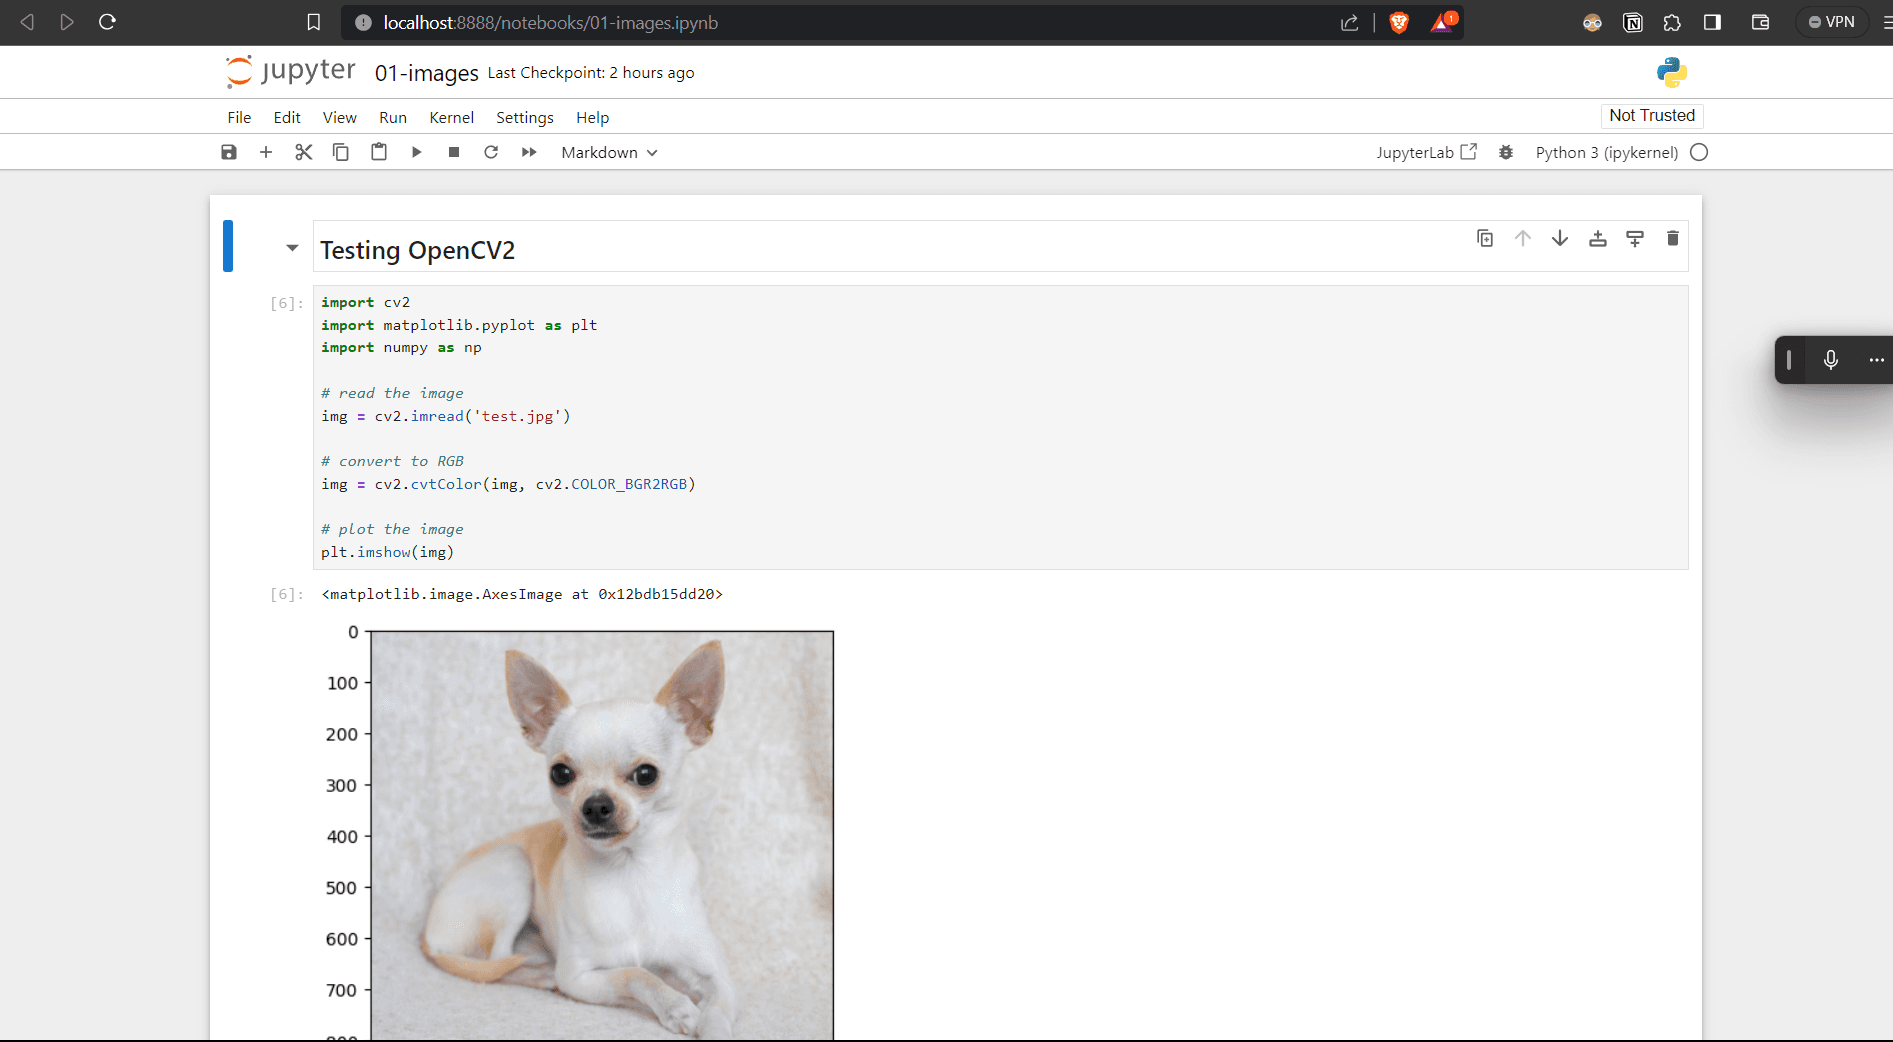
Conclusion
That's it! You now have a fully functional Python environment with Jupyter Notebooks in VS Code on Windows.
I have written this guide for Master's college students who are new to Python and Jupyter Notebooks. I hope you find it useful!
